You want to take better pictures than what you are getting with your phone. Sure, phones take amazing photos, and honestly work for a lot of what many people take, but there is a certain mind that is in this for a different reason than just the sole outcome of the act of taking photos. The act of taking a photo can often lean the direction of the photo, pushing it from the mere capture of the thing in front of you, to capturing the feel of the place you are surrounded by, the display of light that reacted in such a way in your eyes, mind, and body, that you decide, I want to capture that. The phone can do that well in many ways, but there is something built into the physicality of a camera that helps lean further into the act. For me they are two very different things. I’ve caught photos I love on my phone, but while shooting the best of them, I’ve wished I had my camera every single time.
Why? Because while phones have adapted much of the language of cameras and offered buttons that simulate the camera device, most of the functions are electronic interpretations of physical devices built into a camera. Even a digital camera is in many ways more analog than a phone’s camera. The aperture ring inside a camera lens moves blades opening the lens wider and narrower. The shutter speed controls a mechanical shutter. Granted film camera’s still reign supreme with regards to genuine analog mechanics, opening windows of light that land on film strips covered with silver iodide which can absorb the light and hold it. Film creates physical magic. Digital camera’s are the next layer. Phones are great, but the act of shooting them is nothing like act of shooting a camera. That is not place judgement. And some I’m sure would happily argue that they enjoy the phone as camera just as much as I enjoy a camera, to which I sincerely say, that is great. I simply don’t. I love holding a camera. I love bringing it to my eye. I love moving it around in the narrow focus of my mind, the thing inside the lens is the totality of everything I am thinking about while shooting a photo. I am looking in one singular place thinking about one singular thing. Anything outside the eye piece during those moments is invisible. And there, inside the camera, with the dexterity of my fingers, I can manipulate the camera to take in the light with specificity and precision. It is my interaction with the camera, not totally dissimilar from the interactions one has with driving an older, manual car. For me these are related pleasures. Manual everything please.
But how to get there? I have a friend on here whom I’ve discussed cameras with. (I love to discuss cameras every bit as much as coffee.) I love the differences in how they are laid out, and how they function. But he recently got a proper camera with manual options, and is still working into how to use them. So I thought I’d write this piece on the basic approach of shooting manual on camera. It’s something intimidating to a lot of people and probably unnecessary in many regards for most, but it’s something I particularly enjoy and have learned how to do without thinking about it. I can generally have the camera set up appropriately in just seconds for the light, and change the settings as the light and desire of the photos changes. So let me dive into the writing aspect of this and see if I can pull off how to explain it. I’m a notoriously bad teacher, so this can be challenging. There are many things in life that I’ve learned simply by doing, and teaching them does not necessarily come easy. Ask my wife about my snowboard lessons…
The first thing that would be good to figure out with your camera is whether or not you want to shoot JPEG or RAW. If you plan to edit photos in a program like Lightroom or Capture One, RAW files, which are larger, collect more data to work with. JPEG on the other hand is a sort of prebuilt version of the image. It can still be manipulated but not the extent of the larger RAW file with more data stuff. If you just plan to load the photos directly onto your phone or laptop to post directly on social media, JPEG may be a great option and within most new cameras there are different settings that can be directly applied to your JPEG files giving them different looks. If you plan to edit, RAW leaves a cleaner version of the file, and larger, allowing you to add the look of your choice after.
Whitebalance is a camera setting that will affect JPEG, and also will affect RAW files, but if you are editing, is an easy thing to change. The purpose of white balance is to correct the color temperatures provided by the light source, to accurately portray white. The sun gives a naturally warmer tone than the florescent, so the camera can compensate, or you the user can shift the balance, to the warmth level you like. Most modern cameras have a very capable automatic white balance setting but there are times when the camera shifts in a way you don’t like and that is when you want to adjust the setting either warmer or colder. The warmth scale is often portrayed with several semi-auto settings that include a cloud to resemble a cloudy day, or a sun for full sunshine, and a few various indoor light settings, OR you can typically dial in the specific Kelvin temperature setting you’d like… higher numbers = warmer light. Play with this to get comfortable with the setting modes, and learn where the setting is so you can get to it quickly. Most modern cameras have customizable buttons you can program to access things quickly. This is one I keep programed for an easy touch button and I generally keep it in Auto. But if I’m shooting JPEGs I often would like to change it. In RAW files I plan on correcting it in editing.
While white balance will affect the warmth tone of the photo you are gathering, it will not affect the exposure. There are three settings that affect exposure: ISO, shutter speed, and aperture.

ISO setting ranges from low (50) to high (some cameras 50,000) Think of ISO as a sensitivity setting for the sensor itself. In bright light the sensor is set very low because it does not need much sensitivity to pick up light. For every double in ISO you double brightness of the photo. But with a catch. As you increase the ISO you also increase the grain. Different camera’s handle this differently. There are some cameras that shoot relatively clean and good looking photos at 6400 while others look too grainy at that level. Higher ISO is reserved for when the other two elements are not getting you enough light for the photo, but generally 800 and below results in very clean photos. On a very bright sunny day a very low ISO works (50-100) - mornings, evenings and often indoors 800-3400 works great. In the dark you can expect to have to use higher ISO, but it has to be balanced with the consideration of how grainy the photos will turn out. It is very common to let a camera choose ISO automatically, and you can usually set an upper limit on it so that it does not go into the heavy grain mode on accident.
The other two lets on the stool that is EXPOSURE are shutter speed and aperture. Shutter speed is how quickly the camera exposes the sensor to light. Depending on what you are doing and what you are shooting will determine this. If you are shooting a landscape it is not necessary to have a very fast shutter speed as nothing is moving quickly through the frame. You want the shutter speed to be fast enough to not be affected by the subtle motions of holding the camera, but generally a shutter speed of 1/100 of a second or faster is plenty for a clean image. Below 1/100, if you nudge the camera there is a possibility of blur, though I often shoot 1/40 in low light, and with a camera with stability built into the sensor, they often turn out clean. On the other end of the spectrum are things moving fast through the frame, be it a bird, or a car, or athlete. For those scenarios if you want a clean, sharp image a faster shutter speed is desirable. The faster the object, the faster the shutter speed.
The shutter speed works in concert, and conversely with APERTURE. Aperture is how open the camera lens is, which will decide how much is focus. Aperture is what often confuses people just getting into photography, largely because it is based on a term called F stop. F stop represents a fraction, which represents the aperture. When someone says F4, they are actually referring to F1/4. It represents how OPEN the aperture blades are in the camera lens. If you look from the front of the lens into the lens you will see the aperture blades. Each step in aperture, closing or opening, represents a step up or down in the amount of light let in AND how much will be in the focal plane. A very wide open aperture will let in the most light BUT it will have the shortest focal plane, which means, a shorter area in focus. As you decrease the size of the opening, taking the camera from F 1/4 to F1/10 you decrease the amount of light let into the camera during the chosen shutter speed, but you increase the distance of things in focus.
So let’s say you choose auto ISO for a given shot you are wanting to take at a kids soccer game. It’s a mid summer day. The ISO is going to naturally chose a lower number, meaning less grainy and cleaner shot. The kids are moving rapidly down the field so you want to choose a higher shutter speed, let’s say 1/800 of a second. Now for that given light you may need the camera lens fairly open all the way to 4. But after you take a shot you realize you want more in focus, so you increase the aperture to F8 (1/8) - your camera will now choose a higher ISO to allow the proper exposure. Or, if you choose your own settings for ISO, you will have to. This is why an auto ISO is great for learning as you take on more manual settings.
Now let’s say it’s half time. You want to get a picture of the soccer ball that is sitting near you. It’s a nice soccer ball, and reminds you of when you were a kid. You lean down and focus close. If your aperture is wide open, let’s say to f4 (1/4) there will be a very shallow part of the ball in focus and the background will be entirely blurred. But let’s say you also want the shoes that are sitting next to the ball to be in focus, you can increase the aperture to f8 (1/8) which is in reality DECREASING the size of the opening in the lens, so decreasing light, while increasing the focal plane. More of the ball will in focus. The distant background will still be out of focus, but the blur will different, more in the direction of focus. But you will need to DECREASE the shutter speed to make up for the light you cut out by making the aperture opening smaller.
Still with me? It’s a three way balancing act that is easily reduced to a two way balancing act by choosing auto ISO.
Additionally, as you are starting out, you can selectively choose in the camera settings to ONLY deal with one or the other component. Shutter Priority allows you to choose the shutter speed, ensuring you get crisp imagery for fast moving things if needed, and the camera will adjust the ISO and Aperture for you. Alternatively you can put the camera in APERTURE priority you can choose how wide open or closed the lens is, which results in a shallower or longer focal plane, and the camera will determine the shutter speed for you, and the ISO assuming it’s on auto.
I realize as I write this, to the beginner this could feel very convoluted, and I remember as I learned it that it felt like dyslexia was absolutely not helping. Everything seemed backwards.
But once you start to realize the direct relationship between shutter speed and aperture, and that both are best though of as the fractions they represent, and that the goal is to get adequate light to the censor, it begins to make sense. Increase one, decrease the other. And remember that aperture is a fraction. 1/4 is a much bigger opening than 1/18, so at 1/18 you have to let the light in for much longer to get the same level of light on the exposure.
So now what?
Now is when you play. Shoot a lot. These are digital files were are talking about (though the same principles apply in film, but with film the ISO is set on the film itself so the other two variables are all you need deal with.)
Shoot the same photo with high shutter speed/wide open aperture and slow shutter speed/ tiny aperture. Look at what is in focus. Whether there is blur, and any differences you can see.
If you just recently got a new camera and are planning on taking it somewhere immediately, shoot a lot and try to get to know your settings, or if you haven’t time to learn it, don’t be afraid to use the automatic modes for capturing images you want to be sure are good. But then change the camera into M and play with the settings yourself. This is how you become proficient with manual shooting mode… you just have to do it. Review the pictures as you go. Too dark? Make it brighter. If you are already at a slow shutter speed and don’t want to risk blur, increase the aperture size. If still your image is too dark, and you need it brighter, check the ISO and push it a little higher. These three factors are fun to play with and slowly you will learn the settings of your camera. It is after you become proficient with the controls that using the camera becomes particularly fun. Even I still experience a subtle frustration the first time I pick up a new camera because things are often in a different location. But that frustration is fun to overcome as you learn to use the tool proficiently.
I remember learning to type. It was so wildly frustrating to not be able to move as fast as I wanted and to have to slug along slow find the letters. But then suddenly I had it. The act of typing rapidly went from a thing I dreaded to part of an act I love because it allowed me to better write, faster, and with a cadence that handwriting doesn’t allow for. Learning to use a camera shifts too, from frustrating to exciting as soon as you get the controls down, and your fingers are trained with muscle memory to help create the level of light and tone of the images you put in front of the lens. It’s a wildly satisfying thing. As you look at your photos begin to examine how dark the shadows are, how bright the highlights, or brightest part of the photos are. Are they over exposed? Is the image bright enough? Too bright? Begin shooting where you shoot the same shot with a slow shutter speed and a fast shutter speed to examine the differences. Sometimes a little blur can be fun. Look at the differences of what aperture does. Is more in focus? Less? What look do you like?
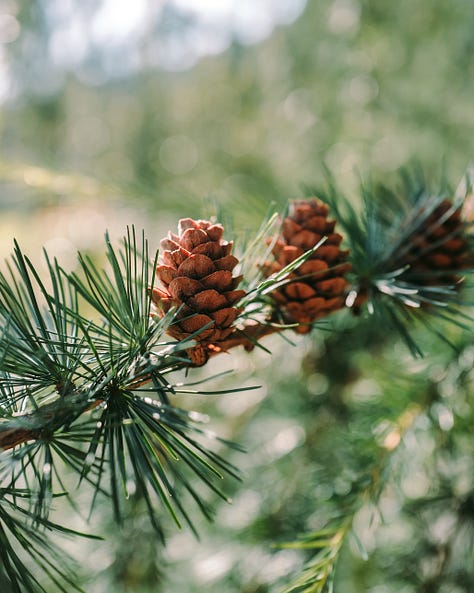

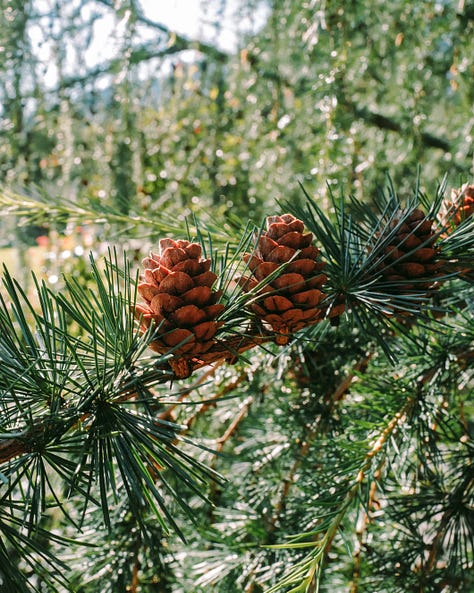
There are a million people on the internet that will tell you the one and only proper way to shoot a photo. Don’t listen though. Look for what you like. Look at photos from others and examine what you like about them. I remember soon after I began getting serious about photography looking at photos from Chris Burkard and noticing that the focal plane was enormous… so much of the photo was in focus from front to back. That requires a relatively high F stop -> which means it’s a relative small opening -> which means I need a slower shutter speed, which sometimes means using a tripod to prevent blur. I did my best to recreate the affect of a long focal plane. Eventually I realized I didn’t necessarily like that affect in many of my photos though. I began shooting more and more with my lens “wide open” -> f4 or f2 opposed to f18… less in focus… and I can use a faster shutter speed. Now I use different F stop vs shutter all the time. As I said, eventually you become proficient enough to just move between the settings without having to think about them.
So there is obviously more we can go into, but I think this is a good stopping point to ask, “is this making sense?” I’d love to hear what you think, and ask me for clarification if something isn’t. As I began writing this I quickly realized that a lot of what I’ve come to take as a given actually comes across complex to people new to picking up a camera.
But I can say, if you are drawn to take photos, moving from a phone to a proper camera is an incredibly fun step to make. When I moved into taking photos seriously it was largely in part for my desire to make imagery, to make art, but in a medium that did not require the isolation or solitude that writing requires. It scratches much the same itch, but I can do photography anywhere, everywhere, and with my kids, friends, and family. Writing is not like that. But, like writing, when you put the camera to your eye, and turn the lens to the singular thing that captured you attention, and that you want to capture, to share, and you are focused on that one singular thing in the world at that moment, that moment of focus and interaction with the tool in your hand that can help you accomplish your goal, is a very wonderful thing. That is the act of photography. Seeing something that draws you in, framing it, exposing it, capturing it in this little box. And then you have it. You can keep it for yourself or you can share with someone you love. Or with with strangers, and make connections through it that you might never otherwise make. Because we are all drawn in life to the same sorts of things. A sunset. A laughing kid playing soccer with his friends. A girl on her horse. Photography allows us to capture not just imagery, but feeling. And the more dexterity you gain with the tool you are using, the more you increase your ability to capture more of it.

Camera’s come in all levels of complexity and cost. And while you may find yourself drawn to “better” cameras as you get into it, a high end camera is absolutely not necessary for taking great photos. There are camera’s out there well over 10 years old that take wonderful and fantastic photos. Some of my favorite photos were shot when I was using very basic, intro level gear. Sometimes you find a camera you simply love, and you fall in love with the camera not because it is is better than others, but because it’s a piece of equipment you enjoy using. But it is not required. A Toyota Camry will take you almost everywhere a Toyota Land Cruiser will, and at half the price. But sometimes you fall in love with the Land Cruiser. There is no right or wrong though. Every modern beyond the most basic point and shoots will offer you the ability to shoot manually or in part manually, and will allow you to better hone in your ability to capture the photos you want. So early on, don’t worry about gear. Get entry level. Much more importantly is to shoot. Shoot like mad. Take the camera with you and shoot everything you are drawn to. Play with the settings. Don’t worry about good or bad pictures, just take more than you know what to do with and look at them. Look at what you like and don’t like, and look at the settings so you begin to think about how you could have changed it to make it better. Look at how you framed the thing. Did you focus on what you were most drawn to? Did you include too much in the fame? Did you include enough?
That part of the discussion will lead us to lenses… but that can be for another day.
So now, please give me a little feedback on if these explanations worked. The writer in me really enjoys trying to break down this thing outside of writing that I spend a large part of every day doing, to see if I can write about it understandably and with a hint of inspiration.




It's articles like these that have helped me learn over the years on my own, so I know new photographers will find them incredibly helpful. Once this information is learned, then it's about going out and playing and shooting and making mistakes over and over ❤️ I never would have shot in manual mode a few years ago, and now it's mostly how I shoot.
This is so educational, Lawson, and the chart you created using AI is a nice bonus. I can't wait to apply what you're teaching and will post any questions here should they arise. Further, I wasn't aware of the difference between RAW and JPEG, so I'll be sure to check my camera's settings. Thank you!